
Quick answer: A Webflow SEO checklist should start with the settings that decide whether Google can find and index your pages: indexing, sitemap, SSL, page titles, meta descriptions, and 301 redirects. After those, add schema, clean CMS fields, fast images, and localization. Webflow gives you the controls, but it does not apply them for you.
Webflow produces clean code and fast pages, so many teams assume SEO is “built in.” Then the site launches, rankings stall, and someone finds the staging domain indexed or the homepage title still says “Home.”
Here is the truth: Webflow gives you the controls, and you still have to use them. This Webflow SEO checklist covers the settings that genuinely move the needle, in the order you should fix them, with a dedicated section for Saudi Arabia and Arabic sites.
Table of Contents
- Which Webflow SEO Settings Matter Most?
- Does Webflow Handle SEO for You?
- How Do You Set Up Page-Level SEO in Webflow?
- How Do You Control Crawling and Indexing in Webflow?
- How Do You Set Up 301 Redirects in Webflow?
- How Do You Add Schema and Canonical Tags in Webflow?
- How Do You Optimize Webflow CMS Pages for SEO?
- How Do You Make a Webflow Site Fast for SEO?
- How Should You Set Up Webflow SEO for Saudi Arabia?
- FAQ
Which Webflow SEO Settings Matter Most?
The Webflow SEO settings that matter most are the ones that control indexing and page identity: the indexing and sitemap settings, SSL, unique SEO titles and meta descriptions, one H1 per page, and 301 redirects. Fix these first, because a mistake here can hide your whole site from Google.
Use this three-tier priority table as the running order of your Webflow SEO checklist.
| Tier | Settings | Why it matters |
|---|---|---|
| Tier 1: Fix before launch | Indexing, XML sitemap, SSL, SEO title, meta description, one H1, 301 redirects | A mistake here can block or confuse Google |
| Tier 2: Fix in week one | Slugs, Open Graph, alt text, canonical tags, CMS SEO fields | Improves clarity, sharing, and duplicate control |
| Tier 3: Fix in month one | Schema markup, image compression, internal links, localization | Adds richer results and long-term gains |
We call this the 3-Tier Webflow SEO Priority. It stops you from polishing alt text while the whole site is set to noindex.
Does Webflow Handle SEO for You?
Webflow handles the technical foundation, such as hosting, SSL certificates, and clean code output, but it does not handle SEO strategy for you. You still need to set titles, descriptions, redirects, and schema yourself, because Webflow also does not do keyword research, write content, or build internal links.
Think of Webflow as a well-built car. The engine is good, but you still have to drive it somewhere. A site with perfect code and no keyword plan will rank for nothing.
That is why a Webflow SEO checklist matters more than the platform’s reputation. If you are still choosing a platform, our comparison of Webflow vs WordPress explains where each one fits.
How Do You Set Up Page-Level SEO in Webflow?
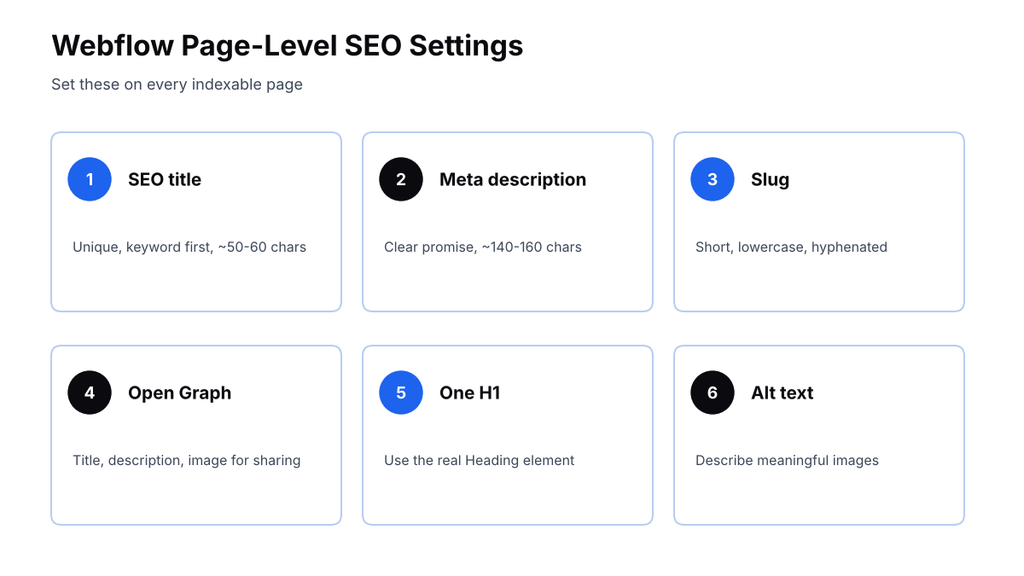
Open the page in Webflow, go to Page Settings, and fill in the SEO fields: a unique title and meta description for every indexable page. Keep titles around 50 to 60 characters and descriptions around 140 to 160 characters, and place the main keyword near the start of the title.
Here is the page-level part of the Webflow SEO checklist:
- SEO title: unique per page, with the primary keyword near the start.
- Meta description: a clear promise, not a keyword list.
- Slug: short, lowercase, hyphenated, and keyword-based.
- Open Graph title, description, and image: inherit from SEO fields or set custom values for sharing.
- One H1: use the real Heading element, not styled body text.
- Alt text: describe meaningful images in plain words. Decorative images can have empty alt text.
A common mistake is leaving default titles on key pages. A title like “Home” or “Services” wastes your strongest ranking signal.
How Do You Control Crawling and Indexing in Webflow?
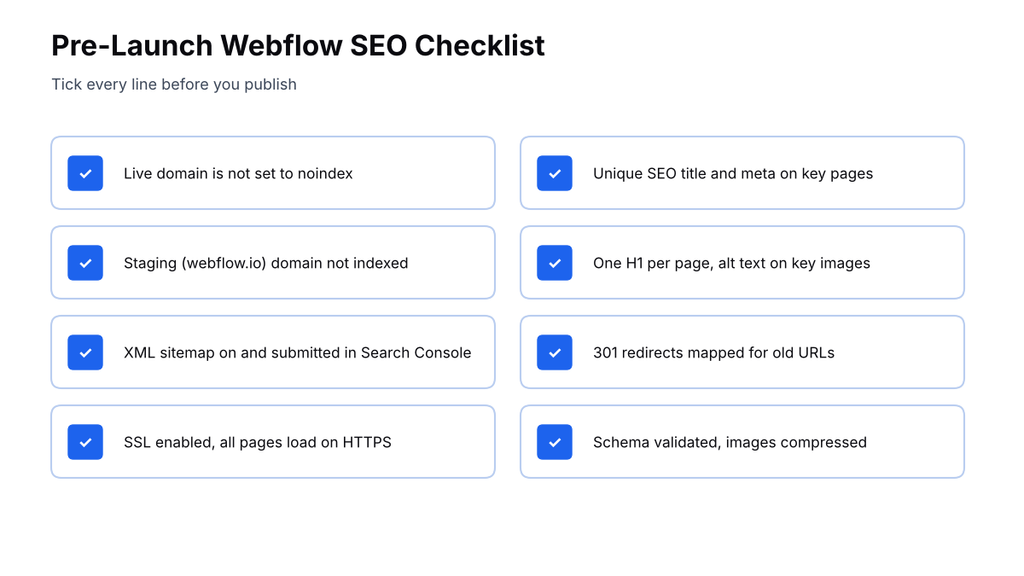
Control indexing in Site Settings and Page Settings, not by guesswork, and check it before every launch. Keep the auto-generated XML sitemap on, add a robots.txt only if you need to block private paths, and noindex pages you do not want in search results. Always make sure your staging domain is not indexed.
Do not confuse the two controls. Robots.txt controls crawling, while noindex controls whether a page appears in search results. Google explains the difference in its robots.txt documentation.
Check these five items in your Webflow SEO checklist before every launch:
- Sitemap: keep the auto-generated sitemap enabled unless you have a specific reason to use a custom one.
- Robots.txt: block only private or staging paths, never important content.
- Staging domain: prevent the default webflow.io domain from being indexed.
- Site-wide noindex: confirm the “hide from search” option is off on the live domain.
- SSL: enable SSL and republish so every page loads on HTTPS.
Blocking the whole site by mistake is the classic cause of sudden traffic drops after a Webflow launch. It takes two minutes to check and weeks to recover from.
How Do You Set Up 301 Redirects in Webflow?
Add 301 redirects in your Webflow Site Settings, under the Publishing area, by entering the old URL path and the new URL path, adding the redirect, and publishing the site. Use a 301 whenever a page moves permanently, so ranking signals pass to the new address and visitors never hit a dead page.
This is critical during migrations. If you move from WordPress or another CMS to Webflow, map every old URL to its new equivalent before launch.
A simple redirect plan for your Webflow SEO checklist looks like this:
| Situation | What to do |
|---|---|
| Old page moved to a new URL | 301 redirect old path to new path |
| Page deleted with a close replacement | 301 redirect to the replacement |
| Page deleted with no replacement | Let it return a 404, or redirect to the nearest category |
| Domain or www change | Redirect all variants to one preferred version |
Avoid redirect chains, where A goes to B and then to C. Point every old URL straight to its final destination.
How Do You Add Schema and Canonical Tags in Webflow?
Add schema and canonical tags through the Custom Code areas in Webflow, using the page’s head code for page-specific JSON-LD schema and the site-wide custom code for tags that apply everywhere. Validate every schema block before publishing, because broken or mismatched markup earns nothing and can create warnings.
Schema helps search engines understand your content. Google’s structured data introduction explains the formats and supported types.
Start with these three schema types from the Webflow SEO checklist:
- Organization: your name, logo, and contact details, on the homepage.
- Article or BlogPosting: for blog posts, with author and dates.
- FAQPage: only where the page has real questions and answers.
For canonical tags, add them where duplicate or near-duplicate pages exist, such as filtered or parameter URLs. Do not canonicalize every page to the homepage, which tells Google to ignore the rest.
How Do You Optimize Webflow CMS Pages for SEO?
Optimize CMS pages by adding SEO fields to your Collection, such as SEO title, SEO description, and slug, then binding them to the template page. This lets every blog post or product page carry its own unique metadata instead of repeating one generic pattern.
The CMS is where Webflow sites most often go wrong. One template can create hundreds of pages, so one mistake repeats hundreds of times.
Use this CMS section of the Webflow SEO checklist:
- Add custom SEO fields to each Collection and bind them to the template.
- Use clear collection paths, such as /blog/ or /resources/.
- Noindex thin pages, such as tag or filter pages that duplicate content.
- Add internal links from each CMS item to related pages.
- Review templates so each item has one H1 and a unique title.
If you run Webflow for several clients, our guide to white label Webflow services covers how agencies manage this at scale.
Key takeaway: In Webflow, one CMS template mistake repeats on every page it generates. Fix the template, not the pages one by one.
Need a hand with a Webflow setup? You can talk to the Teckcod team about a Webflow build or an SEO review.
How Do You Make a Webflow Site Fast for SEO?
Make a Webflow site fast by compressing images before upload, using modern formats, setting sensible image sizes, and keeping heavy scripts and animations under control. Webflow handles hosting, but oversized images and extra scripts are the usual reasons for a slow page.
Speed affects both user experience and search performance. Test your key pages with PageSpeed Insights and fix the biggest problems first.
The speed section of the Webflow SEO checklist:
- Compress images before upload, and use modern formats where possible.
- Size images to their container, not far larger.
- Limit third-party scripts, such as chat widgets and trackers.
- Use animations carefully, since heavy interactions can slow pages.
- Minify CSS, JavaScript, and HTML in your hosting settings.
Keep your Largest Contentful Paint element, usually the hero image, as light as possible. That one element often decides your page speed score.
How Should You Set Up Webflow SEO for Saudi Arabia?
For Saudi Arabia, set up Webflow with separate Arabic and English pages, each with its own unique title, description, and content, and with the correct language and right-to-left layout on Arabic pages. Then verify that your language versions are linked properly so Google serves the right one to the right user.
Saudi searchers use both Arabic and English, so a bilingual site is common. Add these points to your Webflow SEO checklist:
| Situation | What to do |
|---|---|
| Old page moved to a new URL | 301 redirect old path to new path |
| Page deleted with a close replacement | 301 redirect to the replacement |
| Page deleted with no replacement | Let it return a 404, or redirect to the nearest category |
| Domain or www change | Redirect all variants to one preferred version |
Google explains how to tag language versions in its localized versions guide. Follow it, then check the live page source to confirm.
For local businesses, pair this setup with a strong Google Business Profile. Our local SEO checklist for Saudi businesses walks through it. If you are hiring help, read the questions to ask before hiring a web design agency in Riyadh first.
Key takeaways:
- A Webflow SEO checklist works because Webflow gives you SEO controls, but you must set them.
- Fix indexing, sitemap, SSL, titles, descriptions, and redirects before launch.
- Fix CMS templates once, because mistakes repeat on every page.
- Add schema only where the content matches it, and validate it.
- For Saudi sites, give Arabic and English pages their own content, settings, and language tags.
A good Webflow SEO checklist is short, ordered, and used every time. Run the Webflow SEO checklist before launch, again after every big change, and keep a copy for your team.
FAQs
Is Webflow good for SEO?
Yes, Webflow is good for SEO because it gives you control over titles, descriptions, redirects, sitemaps, and schema, and it outputs clean code with built-in hosting and SSL. However, it does not do SEO for you. Rankings still depend on your keyword research, content quality, and how well you apply each setting.
What are the most important Webflow SEO settings?
The most important Webflow SEO settings are indexing and sitemap controls, SSL, unique SEO titles and meta descriptions, one H1 per page, and 301 redirects. These decide whether Google can find, understand, and keep your pages in its index, so they come before every other optimization task. After these, set up schema, canonical tags, image optimization, and CMS SEO fields.
How do I add schema markup in Webflow?
Add schema markup in Webflow by pasting JSON-LD into the custom code area of the page, or into the site-wide custom code for markup that applies everywhere. Use types that match your content, such as Organization, BlogPosting, or FAQPage, and validate the markup before you publish the page.